One fun and cool thing we did on our recent New Zealand trip was take along a hand-held GPS device, loaned to us by our wonderful friend Frank Campagna, so that we could mark locations we visited. The GPS came in very handy when driving, as well, as we did have any other New Zealand maps with us, other than those in the guide books or tourist magazines we picked up along the way.
 Frank’s GPS is an eTrex Legend, which is a good, solid, basic GPS available from Garmin. The device has US maps burned into it, but you can also buy additional maps and load them on the device so that it gives you more than the basic longitude/latitude/altitude info when you leave the US. I picked up a copy of the Garmin WorldMap CD on eBay for about $50, which I loaded on to the eTrex. These maps did not give the detail of the US street level mapping, but it was enough to help us get around cities and get between towns. Overall, the system worked really, really well and made the trip much more enjoyable.
Along the way, we saved particular long/lat points on the GPS that we wanted to look up later. Using Google Earth, it is actually pretty easy to find a lot of the locations of the highlights of the trip. However, using the GPS, I’m able to find some locations that are not really clear on Google Earth, given the current low-resolution of most of their New Zealand image data.
 First, a word about Google Earth. Chances are, if you are reading this, I’ve probably had a chance to tell you in person how much I love Google Earth, especially as a fun, basic, fast GIS tool. If you don’t already have it installed on your computer (and your computer is less than 3 years old), go to the Google Earth website, download it, and install it. They have versions for Windows and Mac OS, so there’s really no excuse for not using this wonderful free tool.
Once you have Google Earth installed, there are quite a few things that you can do with it. One of my favorite is saving a location to file (Google Earth calls them KMZ files) that you can email to someone or post on a web page, and someone else can open it up and Google Earth will take them to that location. You can also chain locations together in a KMZ file to create a virtual flying tour from place to place within the Google Earth interface.
Below, I’ve posted links to a few KMZ files that will take you to locations where I took photos in New Zealand. Using Google Earth, you can see the view from space of the place where I took the photo. Previously, you could show someone on a map where you were when you took a particular photo, but now, using Google Earth, you can give them a different perspective on the same landscape in the photograph.
Note: You have to have Google Earth installed on your computer and have your web browser configured to pass KMZ files to Google Earth in order for these links to work for you.
 Jaymie’s Tree in Blenheim – This is the tree that Jaymie picked out before we went on the trip and that we visited when we got to Blenheim.

Interislander Ferry Moving Through Marlborough Sounds – This location came froma GPS coordinate (S 41 14 30.6, E 174 03 28.2) pulled off of the eTrex. Right after I took this coordinate with the eTrex, I shot these photos of Picton as we pulled into port.


Kaikoura Panographic Photo – This is the location where I took a panographic photo I hope to post soon. In the meantime, these are more basic photos of the same area.


Te Pukatea, Abel Tasman National Park – This is the beach Kath and I hiked to on the Abel Tasman coastal trail.


City of Westport, Western South Island, New Zealand – This is the mouth of the river, near the hostel where we stayed.


I’ll post some more of these, eventually, if it turns out anyone enjoys them. Leave a comment if you want me to post more.

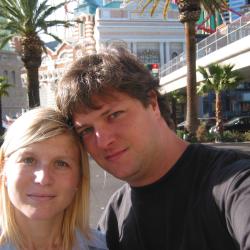 Kath and I are back in the US now, in Las Vegas, preparing for our flight back to Little Rock tomorrow, where we will pick up our dogs and head back to Memphis for work on Thursday. The last few weeks have been a blur, and I’m thankful that I grabbed a few snapshots along the way to help make the whole experience much more real in hindsight.
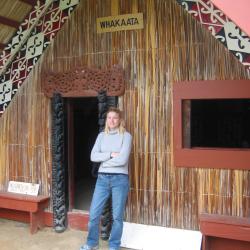
 We flew out of Christchurch without any problems, landing in Sydney without a rental car reserved (we waited too long to book a cheap one, as Christmas to New Year’s is the most busy car rental time in Australia). We cabbed over to La Perouse, glad to be back among our friends there. Karen Linnell put us up the whole time we were in Sydney, and we enjoyed spending time with her and her 4-month old son, Justin. Karen’s wonderful generosity and hospitality will not be forgotten…
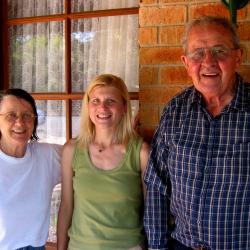 While we were in Australia, we drove up to Hawk’s Nest (about 3 hours north of Sydney) to spend several days with Gillian and Hal Cowlishaw. Gillian was one of Katherine’s academic advisors on her PhD dissertation and is the author of the authoritative
 New Year’s in Sydney was a lot of fun. We rang in the new year at the Yarra Bay Sailing Club, our old haunt when we lived in Sydney during 2001-2002. After that, we headed down to Auntie Marge’s for a feed and few more Victoria Bitters with the gang.
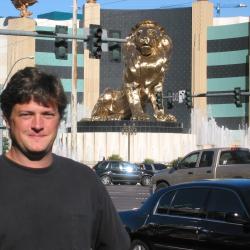 We are enjoying Vegas but are experiencing a bit of culture shock after diving into what I would call “Americana on Speed.” The internet connection at the MGM Grand (where we are staying) is not proving to be very reliable, so I will just post a few photos and look forward to seeing all of our Memphis pals in a few days.
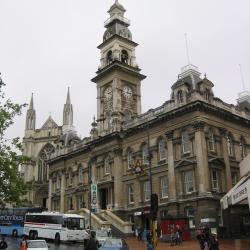 We are currently in Dunedin, which is also pronounced strangely. Say: “Done” and “Eden” together quickly. This city, in the southeast side of the South Island, will always mean rain to us, I bet, because it has been raining for almost 24 hours straight, since we arrived yesterday. It is also cold, or just on the border between cool and cold. The rain has really followed us all over the island. I think that we just caught one of those 2-3 week rain squal periods that we experienced when living in Sydney through the winter. The weather would turn overcast with pretty dramatic blowing rain and gray skies for weeks at a time. It isn’t as depressing as it sounds, but it can be quite annoying, because nothing every gets a chance to dry out.
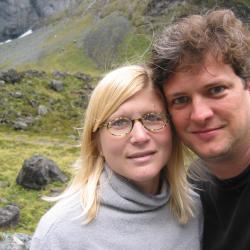 Regardless, the past two areas of the South Island that we travelled through may turn out to be the highlight of the trip. From Te Anu, we headed up the road to Milford to spend a night on the edge of a giant fiord. The weather was even more schitzophrenic there, changing from fog to blowing rain to brilliant sunshine, all within an hour period, but the views made it worth it the trouble. We stayed at the Milford Lodge, one of the only places you can stay in Milford, because the flat area where the river meets the sound is rather limited. We took a boat trip into Milford Sound that went all the way into the Tasman Sea and then back to Milford. This got us very close to the walls of the fiord that run almost vertically into the water from more than a thousand meters in the air, at least in place. There are over 300 waterfalls in Milford Sound, and with the rain we were getting throughout most of the boat trip, they were operating in full effect, spewing water everywhere as they slithered down the rock faces and mossy lumps making their way to the water in the sound, which is composed of a layer about 3-4 meters of fresh, tea-colored water on top of a layer of salt water from the ocean.
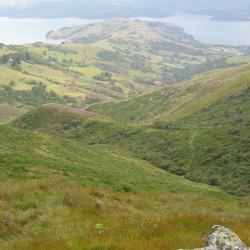
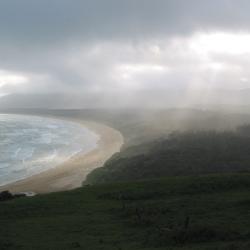 After only one night in Milford, we decided to move on. We had been planning to spend two nights, but the rain was so relentless and the biting sandflies were taking their toll on us. We drove back to Te Anu and then on into the Catlins, a beautiful hilly area between Invercargill and Dunedin, on the extreme south side of the island. There, we stayed in a wonderful farm hostel called Hilltop in Papatowai, which is really only two houses sitting on a hill in the middle of a sheep farm. The facilities were very nice, so nice that we decided to stay an additional night. The Hilltop proved to be the perfect base for a stroll through the Catlins, and we spent most of our day there trolling through the back roads and looking for sea lions, seals and penguins. (We found all of them, including viewing a rare yellow-eyed penguin, which is a threatened species). The waterfalls and green, gently rolling hills were wonderful, but nothing compared to Nugget Point, a thin peninsula that juts southeast from the Catlins with strange vertically-lined rocks that stick out of the water and trail off into the sea. Topped by a lighthouse, Nugget Point is a great vantage point to take in a 270-degree view of sealife, birds, and rolling sea. The weather even cleared up a bit for us to enjoy our lunch while gazing out over the Pacific. Wonderful.
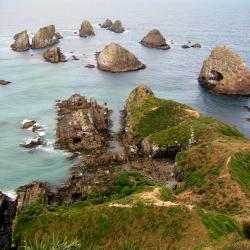
 We are about to leave Dunedin for Akaroa, a town on a peninsula outside of Christchurch, where we will spend Christmas in the middle of the city in a pleasant bed-and-breakfast (thanks Mom and Dad Pennington!). Hopefully, the rain will let up a little before then so that we can enjoy some cool sunny skies before the heat of Sydney beats down on us next week.
 OK, I finally have a complaint about New Zealand. This place completely desensatizes you to beauty on a scale I’ve yet to experience before. Everywhere you look is a postcard, every sunset the best you’ve ever seen, every beer the tastiest, and every walk breathtaking (in more ways than one). As hard as we try, the photos can’t possibly capture it or begin to do it justice. We will just have to be happy with the images in our heads and the memories we are gaining, as well as urge others to go, because words and pictures aren’t enough.
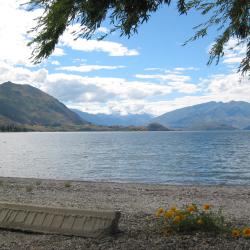 We are currently in Wanaka, which, like most places in New Zealand, can be pronounced incorrectly 3 differnet ways and only correctly once. The correct way is Wa-na-ka, with all of the A’s sounding like “ahh,” in case you are wondering. Wanaka is on the side of a lake, appropriately named Lake Wanaka, and it is surrounded by a couple of different mountain ranges, including Mount Aspiring, the tallest mountain in New Zealand other than Mount Cook. You can be sitting on the banks of the lake, warming in the sun, with the waves lapping at your feet, and out in the distance is a snow- and ice-topped mountain peak, just at the horizon.
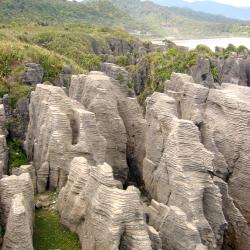 Yesterday began with a trip up the coast, north of Greymouth, to the Pancake Rocks, an interesting three-dimensional sculpture slowly being sculpted out of the limestone by the sea. The formation is called Pancake Rocks because that is exactly what it looks like: a very tall stack of pancakes (minus the syrup, of course). As the water rushes in during high tide, it sounds like a locomotive on the tracks as it crashes on the walls and throws spray in the air. From a distance, when you approach the formation through thick folage, it sounds like a creature is beating on the ground below with an irregular thud, trying to break free. Lucky for us, we got away just in time, down the coast toward the Frank Josef and Fox glaciers.
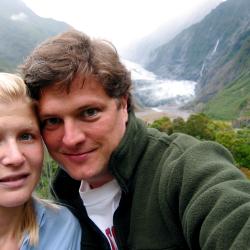 We elected for a short trip at the glacier sites, as we wanted to be in Wanaka for the night, but a few hours proved to be long enough. Still, they were well worth the trip and long walks up the hills to approach each glacier’s terminal face. The glaciers have retreated quite a bit over the past 250 years, and they seem like they will continue retreating for some time, melting more ice than what is forming at the top of the mountains. Still, it was cool (literally) to see what millions of tons of ice could do to solid granite. At the Franz Josef, we just took in the view from a distance. However, at the Fox, we moved right up next to the terminal face. Almost a little too close. Those signs noting extreme danger weren’t kidding. A rock the size of our living room chair fell about 40 feet to the stones at the bottom of the terminal face while I was about 25 feet away. The sound was, well, extremely scary. And all the way back to the car, I kept hearing the boulders turning over in the stream that runs away from the glacier from the force of the rushing water, and I kept looking over my shoulder, thinking a massive block of ice had broken free and was rushing down to crush me. But the overall effect of being next to the glacier was like standing next to a giant ice cube. A very scary, noisy, gigantic, dirty ice cube.
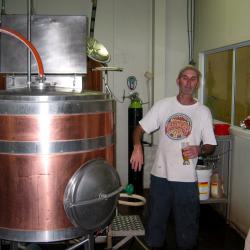 We took a very cool trip to the Wanaka Beerworks today to see how they brewed their very natural, fresh, delicious beer. The tour was excellent, and we really enjoyed talking to the owner/brewmaster, Dave, about what it takes to make a microbrew that can do battle with the giants of the NZ brewery industry.
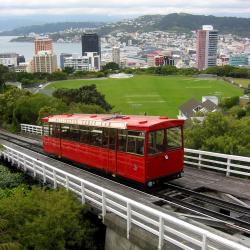 We spent our first day simply wandering around and catching some of the better museums. I can recommend to anyone that the first thing you should do in Wellington, so long as it is daytime, is to take the cable car to the top of hill that overlooks the city and then wander through the botanic gardens as you walk downhill back to the city. The part about downhill is very important. Downtown Wellington is shaped like a roughly-shaped bowl, open on the side that faces the harbor. As long as you stay near the water, you will not have to climb too many hills. However, leave the main downtown area and you will really give your legs (and lungs and heart) a work-out. After a couple of days, Kath and I have learned to ask questions of ourselves when planning a particular trek, such as: “How far up will this take us?” or “Is there a similar store that is not over that steep ridge?”
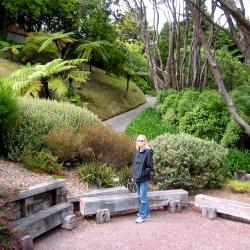 The museum that really got me excited about coming to Wellington was Te Papa, the new national museum opened only a few years ago. And, I can say that the museum really doesn’t disappoint, expecially since I mostly wanted to see exhibits concerning the experiences of the Maori people (the native inhabitants of New Zealand). I read several books regarding the inital impact of European culture on Maoris, and since most cultural sites revolving around Maori culture are located in the North Island, in places we weren’t going, I was keen to see what I could, especially if I could glimpse it in the mind’s eye of the “average” New Zealand citizen (or even want they wanted to project to the world). Te Papa does a great job of not only bringing Maori history and culture alive but also showcasing current and relevant Maori struggles in the perspective of the various participants, Maori and non-Maori alike. Te Papa is not scared to address issues that are not really settled yet and are still heavily contended. I learned a lot from the museum that I would have never picked up from books, and I guess that might as well be the definition of an important museum.
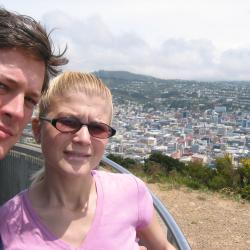
 We made it to Wellington without incident, connecting through Tahiti and Auckland, as planned. Up to now, we had always flown across the Pacific in a complete leap, starting from Los Angeles or San Francisco and landing in Sydney or Auckland. In order to get the cheap seats to make this trip possible, we had to fly Air Tahiti Nui, the national airline of Tahiti, which stops for a few hours in Papeete, the capital of Tahiti, on the way to Auckland.
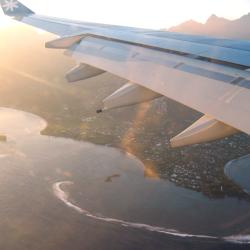

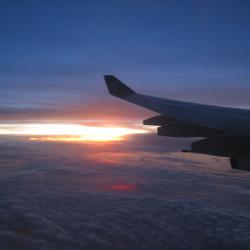
 We arrived in Los Angeles from Little Rock via Houston with little incident. The Air Tahiti Nui flight boards in less than 1 1/2 hours, and the prospect of setting on plane for 8 hours, waiting, 3 hours, and then flying 6 hours more, only to sit in Auckland for 3 hours before flying on to Wellington, is, well, a little daunting. Though I’ve made flights of this duration quite a few times, I’m still a little amazed that it is possible to travel so far, so fast. I guess I should just find my seat, grab a drink, and reflect on how strange it is to be a 33,000 feet … while I’m at 33,000 feet.
 2) What is the name of the holiday being celebrated during the parade scene near the end of


 The first 1/3rd of the trip takes place in a hardwood forest, with a somewhat narrow river channel and a clearly defined river bank. There are plenty of obstacles, above and below the water, and you have to stay sharp in the rather shallow water so as to not take a wrong turn and have to back-track. This is a very smooth part of the river, quiet and majestic, with towering, moss-ringed trees on both sides as you glide by.
 Eventually you reach the beginning of the section that gives the Ghost River its name, a shallow, broad section that flows through a hardwood forest, filled with giant trees and knobs, sometimes with only a few feet between them. Even for a narrow kayak on the approved canoe trail, squeezing through some of the trees proved to be a real problem, especially given the fact that current often runs against the direction of the trail. The canopy above masks the light, and even in the middle of the day, everything gets just a little more spooky. The edges of the bank are usually still in sight but much further away, not that you have time to contemplate how you would get to the bank in your constant struggle to stay on the water path. Think swamp with moving water.
 Eventually, the Ghost River Canoe Trail opens up to what is referred to as Spirit Lake, a broad section of the river with fewer trees, a slightly calmer current, lily pads everywhere on the edges of the channel, and more light. The river meanders through the more open forest, allowing a break from the constant struggle to steer experienced in the Ghost River section. In the Fall, this is the section with the most leaf color and other beautiful scenes. You can see beaver dams off in the backwater areas, large birdhouses built for birds of prey, and stands of thicker forest in the distance. The trees all around you remind you of how high the water can rise, with dark moss rings circling all of the trunks at same height.
 The final section before taking out at Bateman’s Bridge resembles an alpine mountain stream. The banks draw in closer together, the river grows deeper, and the current increases quite a bit. Grassy banks leap from the edges of the river, and meadows appear on either side. If you didn’t know that you were on the Wolf River, you might think you were in Colorado in the middle of summer.